
Why You’ll Love This Recipe
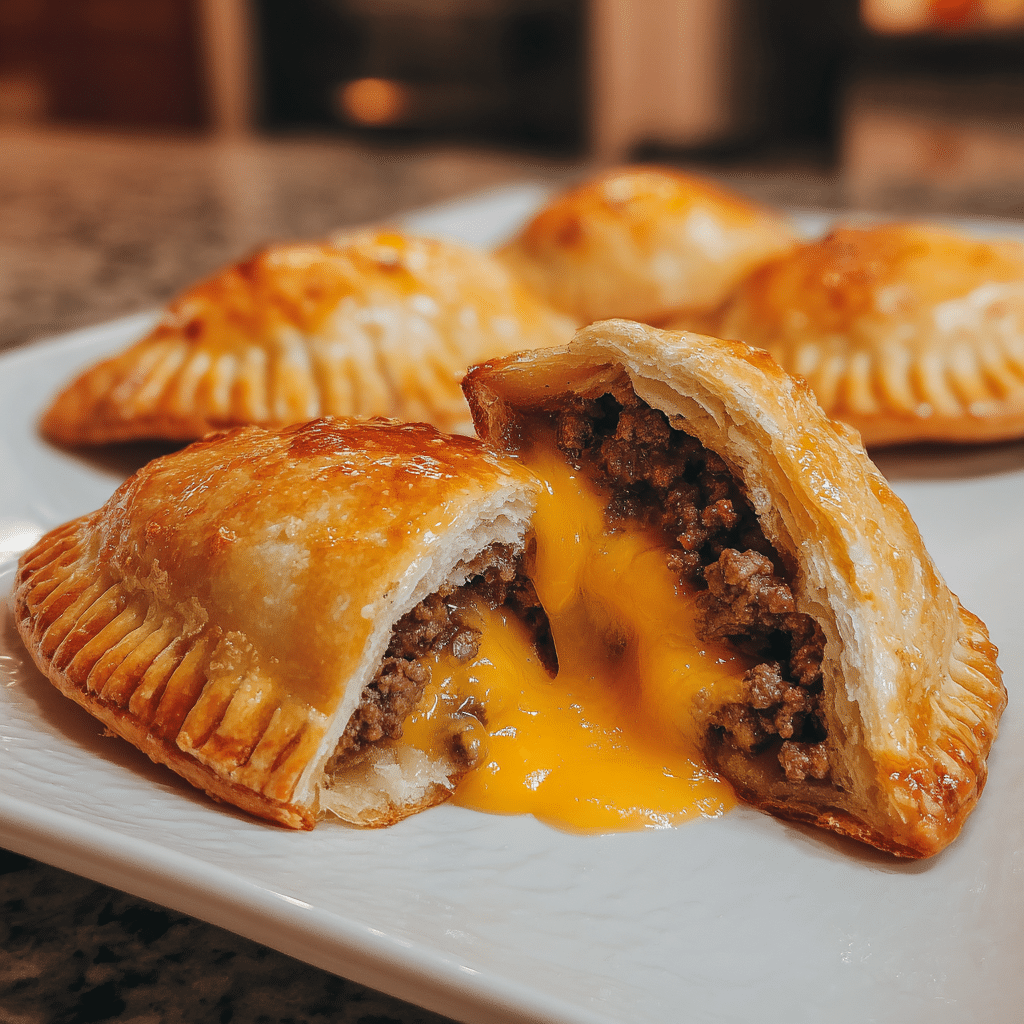
Cheeseburger Hot Pockets are a fun, comforting, and satisfying meal that brings together everything people love about a classic cheeseburger in a warm, handheld form. Crispy on the outside and packed with savory beef, melted cheese, and familiar burger flavors on the inside, these homemade hot pockets are perfect for lunches, casual dinners, or make-ahead snacks. They are especially appealing because they feel indulgent while being completely customizable.
Making them at home allows you to control the ingredients, portions, and seasoning, resulting in a fresher and more flavorful version than store-bought options. When I tested this recipe, I experimented with adding a small amount of mustard to the filling, and it gave the pockets an authentic burger-style tang that worked beautifully. Whether served fresh from the oven or reheated later, these cheeseburger hot pockets deliver comfort food satisfaction in every bite.

Cheeseburger Hot Pockets – A Homemade Twist on a Classic Favorite
- Total Time: 42 minutes
- Yield: 8 hot pockets
- Diet: Halal
Description
Homemade Cheeseburger Hot Pockets with seasoned ground beef, melted cheese, and pickles wrapped in a golden baked crust, perfect for snacks, lunch, or freezer-friendly meals.
Ingredients
- 500 g ground beef
- 1 small onion, finely diced
- 1 tsp salt
- 1/2 tsp black pepper
- 1/2 tsp garlic powder
- 1/2 tsp paprika
- 2 tbsp ketchup
- 1 tbsp yellow mustard
- 1 cup shredded cheddar or American cheese
- 1/2 cup diced pickles (optional)
- 1 package refrigerated pizza dough or crescent dough
- 1 egg, beaten (for egg wash)
- 1 tbsp sesame seeds (optional)
Instructions
- Preheat the oven to 190°C (375°F) and line a baking sheet with parchment paper.
- In a skillet over medium heat, cook ground beef and onion until browned. Drain excess fat.
- Season the beef with salt, pepper, garlic powder, and paprika.
- Stir in ketchup and mustard, then remove from heat and let cool slightly.
- Roll out the dough and cut into equal rectangles.
- Spoon beef mixture onto one side of each rectangle.
- Top with shredded cheese and diced pickles if using.
- Fold dough over filling and seal edges with a fork.
- Brush tops with beaten egg and sprinkle with sesame seeds if desired.
- Bake for 18–22 minutes or until golden brown.
- Cool slightly before serving.
Notes
- Let the filling cool before assembling to prevent soggy dough.
- These freeze well before or after baking.
- Reheat in oven or air fryer for best texture.
- Prep Time: 20 minutes
- Cook Time: 22 minutes
- Category: Snack
- Method: Baking
- Cuisine: American
Ingredients
(Tip: You can find the complete list of ingredients and their measurements in the recipe card below.)
Ground beef forms the hearty base of the filling, delivering classic cheeseburger flavor and richness.
Onion adds sweetness and depth to the beef mixture, enhancing the overall savory profile.
Garlic brings warmth and aroma, rounding out the filling without overpowering it.
Salt and black pepper season the beef and balance the flavors.
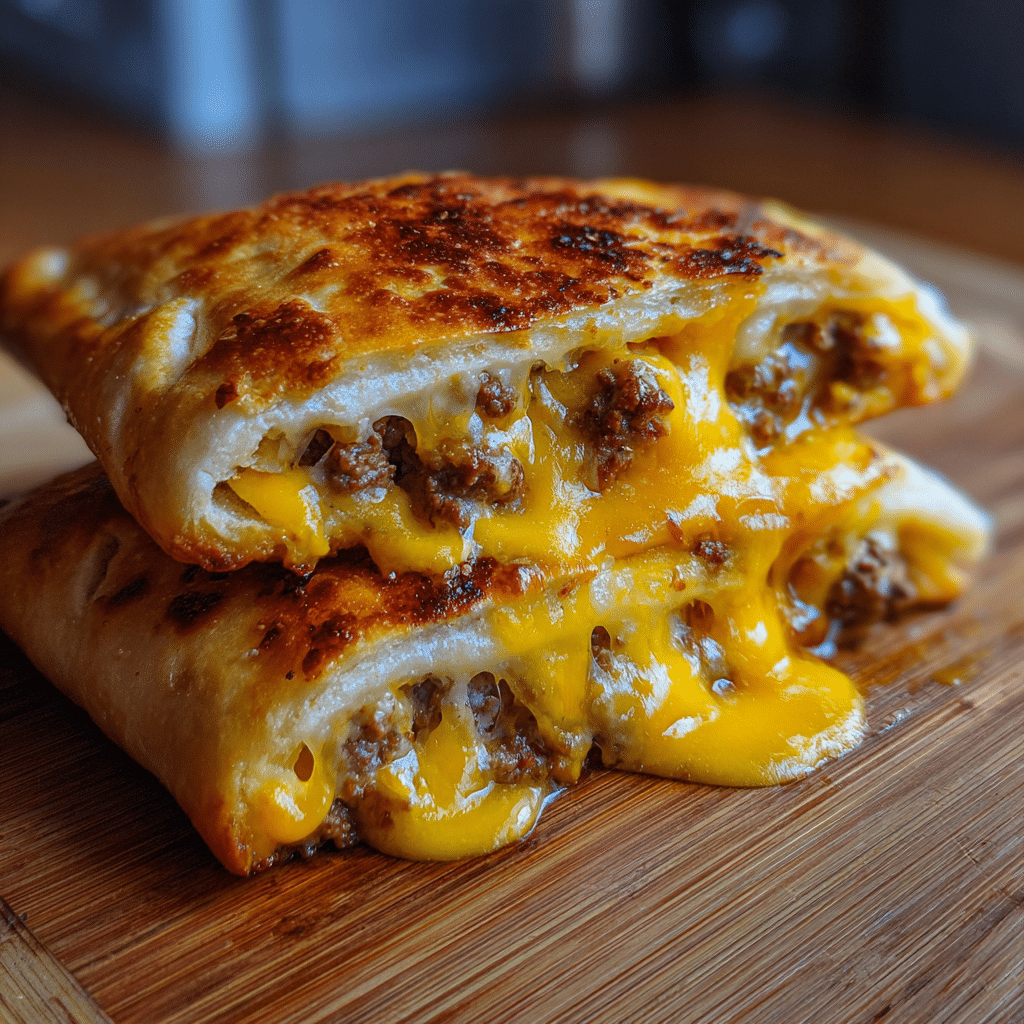
Cheddar cheese provides a rich, melty center that defines the cheeseburger experience.
Mozzarella cheese adds extra meltability and a mild creaminess.
Ketchup contributes sweetness and moisture, mimicking traditional burger condiments.
Mustard adds a subtle tang that enhances the cheeseburger flavor.
Prepared pizza dough or refrigerated dough serves as the outer shell, creating a soft interior and lightly crisp exterior.
Egg wash helps seal the edges and gives the pockets a golden finish when baked.
Directions
Begin by preheating your oven to 200°C (400°F) and lining a baking sheet with parchment paper.
In a skillet over medium heat, cook the ground beef with the chopped onion until the meat is fully browned and the onion is soft. Add the garlic, salt, and black pepper, stirring until fragrant. Remove from heat and allow the mixture to cool slightly.
Stir ketchup and mustard into the beef mixture, then fold in the shredded cheeses until evenly combined. Cooling the filling slightly prevents the dough from becoming soggy during assembly.
Divide the dough into equal portions and roll each piece into a rectangle. Spoon the filling onto one half of each rectangle, leaving space around the edges. Fold the dough over the filling, press the edges together, and crimp with a fork to seal.
Brush the tops with egg wash and place the pockets on the prepared baking sheet. Bake for 15 to 18 minutes, or until golden brown and cooked through. Allow them to cool briefly before serving.
Equipment needed :
Must-Have Tools to Get Rolling
Here’s what you’ll want to have on hand:
Silicone Spatula – Durable, heat-resistant silicone spatula perfect for mixing, scraping, and spreading. Gentle on non-stick cookware and easy to clean.
Large pot – You’ll need this to boil the whole cabbage head and soften the leaves.
large bowl –Spacious, durable large bowl ideal for mixing, serving, or food preparation. Made from sturdy material and easy to clean.
Sharp knife – For coring the cabbage and slicing out the thick stem in each leaf. A paring knife works best.
Mixing bowl – A big bowl makes it easier to combine your meat and rice filling evenly.
Cutting board – For prepping cabbage leaves and rolling them like a pro.
Full-Size Blender – is a powerful kitchen appliance for making smoothies, soups, and sauces in large batches.
3-in-1 Air Fryer – This versatile 3-in-1 air fryer offers Air Fry for healthier meals with less oil, Bake for bakery-quality desserts and treats, and Reheat to bring leftovers back to life with crispy, flavorful results.
Servings and timing
This recipe yields approximately 6 cheeseburger hot pockets. Preparation time is about 20 minutes, with a baking time of 15 to 18 minutes, making the total time roughly 40 minutes.
Storage/reheating
Cheeseburger hot pockets can be stored in an airtight container in the refrigerator for up to three days. To reheat, place them in the oven at a low temperature until warmed through, or microwave for convenience. For best texture, reheating in the oven helps maintain crispness.
Variations and Customizations
This recipe is easy to customize to suit different preferences. You can add finely chopped pickles or relish to the filling for a more traditional cheeseburger taste. Bacon crumbles also add a smoky, savory element.
For a lighter option, ground turkey can replace beef while still delivering satisfying flavor. You can also experiment with different cheeses, such as American cheese for a classic diner-style melt or pepper jack for added heat.
When I tested a version with whole wheat dough, the pockets had a slightly heartier texture while still baking up beautifully. These variations make the recipe adaptable without losing its comforting appeal.
Nutrition and Dietary Info
Cheeseburger hot pockets provide protein from the beef and cheese, along with carbohydrates from the dough. Adjusting portion size, meat choice, and cheese type can help tailor this recipe to different dietary needs.
Expert Tips & Customizations
Cool the Filling
Allowing the filling to cool slightly helps prevent soggy dough.
Seal Well
Crimp edges firmly to keep the filling from leaking.
Even Portions
Using equal amounts of filling ensures consistent baking.
Bake Until Golden
A deep golden color signals a fully cooked, crisp exterior.
FAQs
Can I make these ahead of time?
Yes, they can be assembled in advance and baked when needed.
Can I freeze cheeseburger hot pockets?
Yes, freeze them unbaked and bake directly from frozen with extra time.
What dough works best?
Pizza dough or refrigerated dough both work very well.
Can I air fry these?
Yes, air frying produces a crispy exterior in less time.
Are these suitable for children?
Yes, they are familiar, filling, and easy to eat.
Can I add vegetables?
Yes, finely chopped peppers or mushrooms work well.
How do I prevent leaks?
Seal edges tightly and avoid overfilling.
Can I make them spicy?
Add hot sauce or spicy cheese to the filling.
What dipping sauces pair well?
Ketchup, burger sauce, or cheese sauce work nicely.
Can I make them smaller?
Yes, simply divide the dough into smaller portions.
Conclusion
Cheeseburger Hot Pockets are a comforting, homemade alternative to store-bought snacks, combining classic burger flavors with the convenience of a handheld meal. Easy to prepare, customizable, and freezer-friendly, this recipe is perfect for busy days, casual meals, and satisfying cravings with familiar flavors.
Hungry for more? Visit our website for full recipes and follow us on Pinterest for daily foodie inspo you’ll love to pin!