

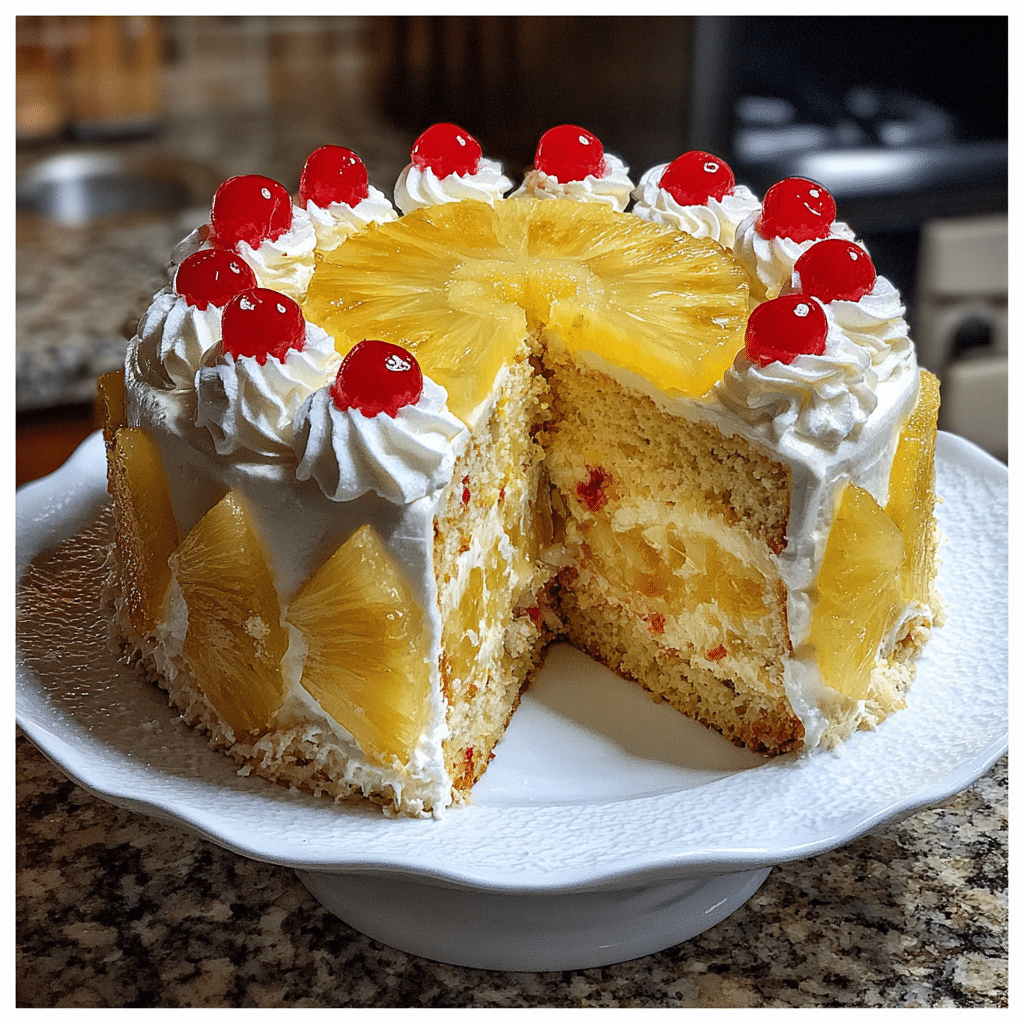
Juicy Pineapple Heaven Cake is a tropical dessert that delivers an irresistible combination of moist cake, sweet pineapple, and rich flavors. This cake is a perfect balance of sweet and tangy, with the pineapple adding a burst of juiciness to each bite. It’s a simple, yet indulgent dessert that’s sure to impress at any gathering, whether it’s a birthday, a family dinner, or just a treat to enjoy at home. I first discovered this recipe during a summer gathering and was amazed at how easily it came together while still delivering big flavor. The cake’s tender texture and the sweetness of the pineapple create an unforgettable treat that you’ll want to make over and over again.
Print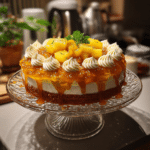
Juicy Pineapple Heaven Cake: A Tropical Delight for Every Occasion
- Total Time: 45 minutes
- Yield: 12 servings
- Diet: Vegetarian
Description
A light and moist cake with a rich pineapple flavor, topped with a juicy pineapple glaze for an irresistible dessert.
Ingredients
- 1 box yellow cake mix
- 1 can (20 oz) crushed pineapple in syrup, undrained
- 1/2 cup vegetable oil
- 3 large eggs
- 1 tsp vanilla extract
- 1/4 cup brown sugar
- 1/4 cup unsalted butter
- 1 cup powdered sugar
- 1/2 tsp vanilla extract (for glaze)
- 1/4 cup heavy cream
Instructions
- Preheat the oven to 350°F (175°C). Grease and flour a 9×13-inch baking dish.
- In a large mixing bowl, combine the yellow cake mix, crushed pineapple (with syrup), vegetable oil, eggs, and vanilla extract. Stir until fully combined and the batter is smooth.
- Pour the batter into the prepared baking dish and bake for 30-35 minutes, or until a toothpick inserted into the center comes out clean.
- While the cake is baking, prepare the glaze by melting the butter in a small saucepan over medium heat. Add the brown sugar and heavy cream, stirring to combine. Bring to a simmer and cook for 3-4 minutes until the mixture thickens slightly.
- Remove from heat and stir in the powdered sugar and vanilla extract until smooth and glossy.
- Once the cake is baked and slightly cooled, poke small holes all over the top with a fork. Pour the pineapple glaze over the cake, allowing it to soak into the cake. Let the cake cool completely before serving.
- For extra flavor, top with whipped cream or fresh pineapple slices before serving.
Notes
- For an extra tropical twist, add shredded coconut to the cake mix or sprinkle on top of the glaze.
- Make sure the cake is completely cool before serving to allow the glaze to set.
- This cake can be made a day ahead and stored in the refrigerator to let the flavors meld.
- Prep Time: 10 minutes
- Cook Time: 35 minutes
- Category: Dessert
- Method: Baking
- Cuisine: American
Ingredients Breakdown
(Tip: You can find the complete list of ingredients and their measurements in the recipe card below.)
Pineapple: The star ingredient of this cake, fresh or canned pineapple adds moisture and sweetness. The natural juices from the pineapple infuse into the cake, making it incredibly moist. If you’re using canned pineapple, be sure to drain it well before adding it to the batter.
Butter: Butter gives this cake its rich, tender texture. The fat content in butter helps keep the cake moist while adding flavor. It’s essential to use softened butter for easy incorporation into the batter.
Sugar: Granulated sugar sweetens the cake and helps with the texture. It also helps the cake rise slightly, contributing to the light, airy crumb that contrasts beautifully with the juicy pineapple.
Eggs: Eggs provide structure and help bind the ingredients together. They also contribute to the moisture of the cake, ensuring that it stays tender.
All-Purpose Flour: This is the base of the cake. Flour provides structure and ensures the cake holds together while remaining light and fluffy.
Baking Powder: This leavening agent ensures that the cake rises properly. It gives the cake a light texture without being too dense.
Vanilla Extract: Vanilla extract enhances the overall flavor, adding depth and complementing the natural sweetness of the pineapple.
Salt: A small pinch of salt helps balance the sweetness of the cake and enhances the flavor of the pineapple and vanilla.
Whipped Topping (Optional): For a final indulgent touch, you can top the cake with whipped topping, which adds a light, creamy finish. You could also use whipped cream if you prefer a richer topping.
Step-by-Step Cooking Instructions
- Preheat the Oven: Preheat your oven to 350°F (175°C). Grease and flour a 9×9-inch baking pan or line it with parchment paper for easy removal.
- Prepare the Pineapple: Drain the pineapple well if using canned pineapple. Set aside, reserving some juice to add to the cake if desired.
- Cream the Butter and Sugar: In a large mixing bowl, cream together the softened butter and sugar until light and fluffy. This usually takes about 3-4 minutes with an electric mixer.
- Add the Eggs and Vanilla: Beat in the eggs, one at a time, ensuring each is fully incorporated. Stir in the vanilla extract for a bit of extra flavor.
- Add the Dry Ingredients: In a separate bowl, whisk together the flour, baking powder, and salt. Gradually add this dry mixture to the wet ingredients, mixing just until combined.
- Fold in the Pineapple: Gently fold in the drained pineapple, being careful not to overmix the batter. The pineapple will add moisture and flavor to the cake.
- Bake the Cake: Pour the batter into the prepared pan and spread it out evenly. Bake for 30-35 minutes, or until a toothpick inserted into the center comes out clean.
- Cool the Cake: Allow the cake to cool in the pan for 10 minutes before transferring it to a wire rack to cool completely.
- Optional Topping: Once the cake has cooled, top it with whipped topping or whipped cream, and garnish with extra pineapple chunks or toasted coconut flakes if desired.
Servings and Timing
This recipe yields about 8-10 servings. It takes about 10 minutes to prepare the ingredients, and the baking time is around 30-35 minutes. After cooling, the cake is ready to serve, making the total time around 45 minutes to 1 hour.
Equipment needed :
Must-Have Tools to Get Rolling
Here’s what you’ll want to have on hand:
Silicone Spatula – Durable, heat-resistant silicone spatula perfect for mixing, scraping, and spreading. Gentle on non-stick cookware and easy to clean.
Large pot – You’ll need this to boil the whole cabbage head and soften the leaves.
large bowl –Spacious, durable large bowl ideal for mixing, serving, or food preparation. Made from sturdy material and easy to clean.
Sharp knife – For coring the cabbage and slicing out the thick stem in each leaf. A paring knife works best.
Mixing bowl – A big bowl makes it easier to combine your meat and rice filling evenly.
Cutting board – For prepping cabbage leaves and rolling them like a pro.
Full-Size Blender – is a powerful kitchen appliance for making smoothies, soups, and sauces in large batches.
3-in-1 Air Fryer – This versatile 3-in-1 air fryer offers Air Fry for healthier meals with less oil, Bake for bakery-quality desserts and treats, and Reheat to bring leftovers back to life with crispy, flavorful results.
Must-Have Tools to Get Rolling
Here’s what you’ll want to have on hand:
- Baking Pan: A 9×9-inch pan is perfect for this recipe. If you prefer a thicker cake, you can use a smaller pan, but be sure to adjust the baking time.
- Electric Mixer: An electric mixer makes creaming the butter and sugar easy, but a hand whisk works just as well.
- Measuring Tools: Accurate measuring spoons and cups ensure that you get the right proportions of ingredients.
- Cooling Rack: A cooling rack is essential for letting the cake cool evenly and preventing it from becoming soggy.
Variations and Customizations
While this Juicy Pineapple Heaven Cake is already bursting with tropical flavor, there are plenty of ways to make it your own:
- Add Coconut: For an extra tropical twist, add shredded coconut to the batter. Coconut pairs beautifully with pineapple, making the cake even more flavorful and textured.
- Use Different Fruit: If you’re not a fan of pineapple, you can swap it out for other fruits like peaches, mangoes, or berries. Just be sure to adjust the baking time based on the fruit’s moisture content.
- Make It Vegan: To make this cake vegan, substitute the eggs with flax eggs or applesauce, and use dairy-free butter and a plant-based whipped topping.
- Add a Streusel Topping: For an added layer of texture, sprinkle a streusel topping (made from flour, sugar, butter, and cinnamon) over the batter before baking. The streusel will bake into a crunchy, sweet topping.
- Serve with Ice Cream: For a truly indulgent dessert, serve slices of this cake with a scoop of vanilla or coconut ice cream.
Nutrition and Dietary Info
| Nutrient | Amount per Serving |
|---|---|
| Calories | 250 |
| Protein (g) | 2 |
| Carbs (g) | 40 |
| Fat (g) | 9 |
| Saturated Fat (g) | 5 |
| Fiber (g) | 1 |
| Sugar (g) | 25 |
| Sodium (mg) | 160 |
Expert Tips & Customizations
Don’t Overmix the Batter: When adding the dry ingredients, mix until just combined. Overmixing can lead to a dense cake, and we want it light and fluffy!
Use Fresh Pineapple for Extra Freshness: If you have fresh pineapple on hand, it will add even more vibrant flavor to the cake. Just be sure to chop it finely and drain the juice.
Cool the Cake Completely Before Topping: Allow the cake to cool completely before adding any whipped topping or cream. This helps prevent it from melting into the cake and ensures a nice, creamy finish.
FAQs
Can I make this cake ahead of time?
Yes, you can bake the cake up to two days ahead of time. Store it in an airtight container at room temperature until ready to serve.
Can I freeze this cake?
Yes, this cake freezes well. Wrap it tightly in plastic wrap and aluminum foil, then store it in a freezer-safe container for up to 2 months.
How do I store leftover cake?
Store leftovers in an airtight container at room temperature for up to 3 days. If you added whipped topping, keep the cake in the fridge.
Can I use a different type of fruit?
Absolutely! You can use other fruits like peaches, mangoes, or berries. Just adjust the baking time if needed, depending on the moisture content of the fruit.
How do I make the cake more decadent?
For a richer dessert, serve the cake with vanilla ice cream or drizzle caramel sauce on top for extra sweetness.
Can I make this cake without whipped topping?
Yes, you can serve the cake without whipped topping, or you can substitute it with a drizzle of cream cheese frosting for a tangier contrast.
How do I know if the cake is done?
The cake is done when a toothpick inserted into the center comes out clean or with a few moist crumbs. Avoid overbaking to keep the cake moist.
Can I use cake mix for this recipe?
If you’re short on time, you can use a boxed cake mix and add the pineapple to it, but the homemade version will have more depth of flavor.
Can I add coconut to the batter?
Yes, shredded coconut works wonderfully in this recipe and enhances the tropical flavor of the cake.
How do I make the cake fluffier?
To make the cake fluffier, make sure to measure your flour properly and avoid overmixing the batter.
Conclusion
Juicy Pineapple Heaven Cake is a tropical-inspired dessert that’s sure to become a favorite. With its moist, flavorful crumb and the perfect balance of pineapple sweetness, it’s a treat everyone will love. Whether you’re serving it at a summer gathering or making it as a cozy treat for yourself, this cake is a delightful way to indulge in tropical flavors. With easy ingredients and simple steps, this recipe is perfect for any baker looking to create a sweet, memorable dessert.
Hungry for more? Visit our website for full recipes and follow us on Pinterest for daily foodie inspo you’ll love to pin!