
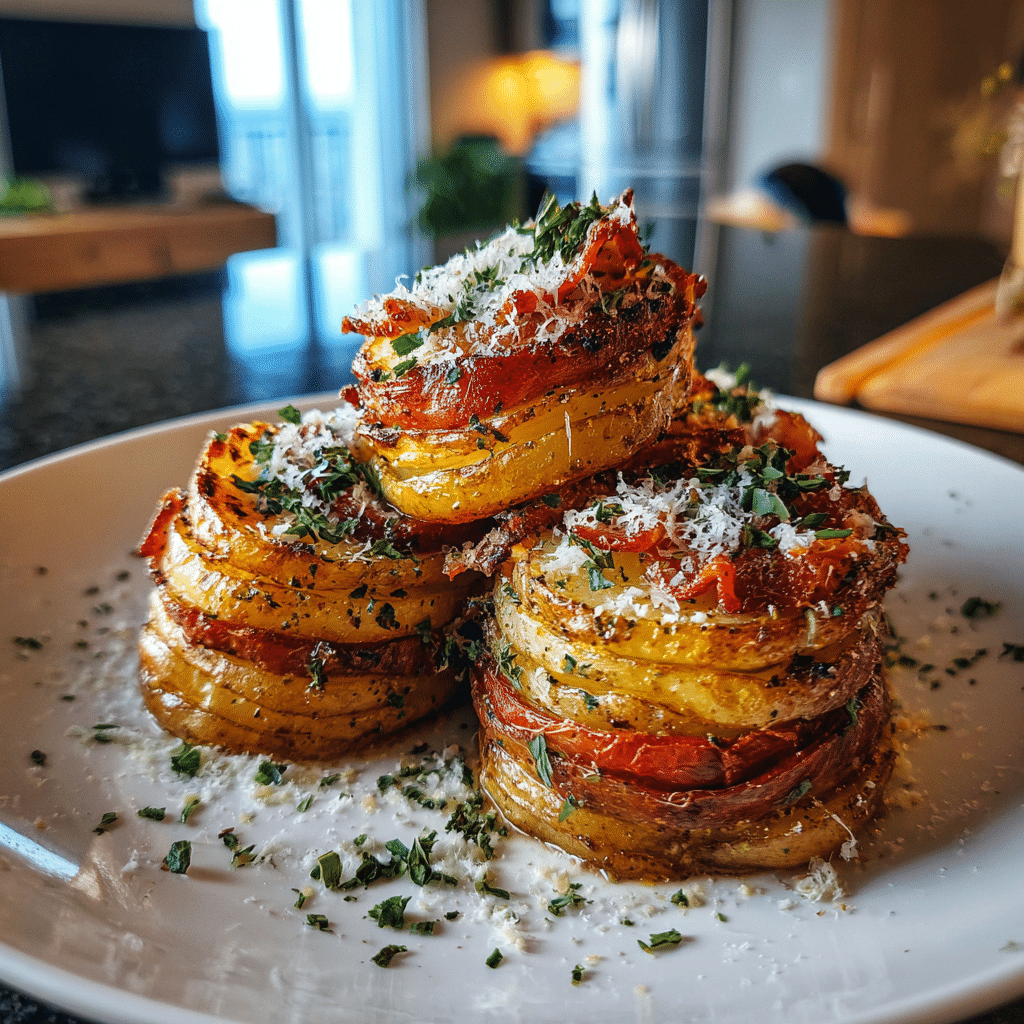
If you’re looking for a side dish that combines elegance, crunch, and simplicity, Crispy Baked Potato Stacks are the answer. These golden, layered potato rounds bake up with irresistibly crispy edges and tender, buttery centers. Think of them as the perfect blend of roasted potatoes and scalloped potatoes—but with a crispier, more gourmet touch. They’re ideal for Sunday dinners, holiday feasts, or any meal where you want to elevate plain potatoes into something special. I tried this recipe with a sprinkle of Parmesan and rosemary, and the aroma alone was heavenly. Once you make these once, they’ll easily become a go-to favorite for any occasion.

Why You’ll Love This Recipe
This dish transforms humble potatoes into an impressive and delicious side with minimal effort. The thin slices roast evenly, soaking up butter, herbs, and cheese to create a melt-in-your-mouth texture with perfectly crisp edges. Plus, it’s easy to customize—whether you like them garlicky, cheesy, or herbed, this recipe delivers every time.
Crispy Baked Potato Stacks – Perfectly Roasted Layers of Flavor
- Total Time: 1 hour
- Yield: 12 potato stacks
- Diet: Vegetarian
Description
Thinly sliced potatoes layered and baked until golden, crispy on the edges, and tender inside — a simple yet elegant take on roasted potatoes.
Ingredients
- 4 large russet or Yukon Gold potatoes, peeled
- 3 tbsp unsalted butter, melted
- 2 tbsp olive oil
- 2 cloves garlic, minced
- 1 tsp fresh thyme leaves (or 1/2 tsp dried thyme)
- 1/2 tsp salt
- 1/4 tsp black pepper
- 1/4 cup grated Parmesan cheese (optional)
- Fresh parsley, chopped (for garnish)
Instructions
- Preheat oven to 400°F (200°C). Lightly grease a 12-cup muffin tin or baking dish.
- Using a mandoline or sharp knife, slice potatoes into very thin rounds (about 1/8 inch thick).
- In a large bowl, whisk together melted butter, olive oil, garlic, thyme, salt, and pepper.
- Add potato slices to the mixture and toss until evenly coated.
- Stack 8–10 potato slices in each muffin cup, layering them slightly offset to create height.
- Sprinkle the tops with Parmesan cheese if desired.
- Bake for 40–45 minutes, or until the potatoes are crispy on the edges and tender in the center.
- Let cool for 5 minutes, then carefully remove from the pan. Garnish with parsley before serving.
Notes
- Use Yukon Gold potatoes for a buttery texture or russet potatoes for extra crispiness.
- Can be made ahead and reheated in the oven before serving.
- For extra flavor, add a sprinkle of smoked paprika or rosemary.
- Prep Time: 15 minutes
- Cook Time: 45 minutes
- Category: Side Dish
- Method: Baking
- Cuisine: American
Ingredients
(Tip: You can find the complete list of ingredients and their measurements in the recipe card below.)
Potatoes
Yukon Gold or Russet potatoes work best for this recipe. Yukon Golds give a buttery flavor and creamy texture, while Russets create crispier edges.
Butter
Melted butter coats every slice, giving them a rich flavor and that irresistible golden-brown finish.
Olive oil
Adding a touch of olive oil helps the potatoes crisp up beautifully without drying out.
Garlic
Fresh minced garlic infuses each layer with savory aroma and depth, making the stacks flavorful through and through.
Fresh thyme (or rosemary)
Herbs like thyme or rosemary add earthy notes that balance the richness of the potatoes.
Salt and pepper
Essential for seasoning—don’t skip these! A little salt brings out the potatoes’ natural sweetness, while pepper adds a gentle bite.
Parmesan cheese
A sprinkle of grated Parmesan before baking enhances the crisp texture and adds a subtle nutty finish.
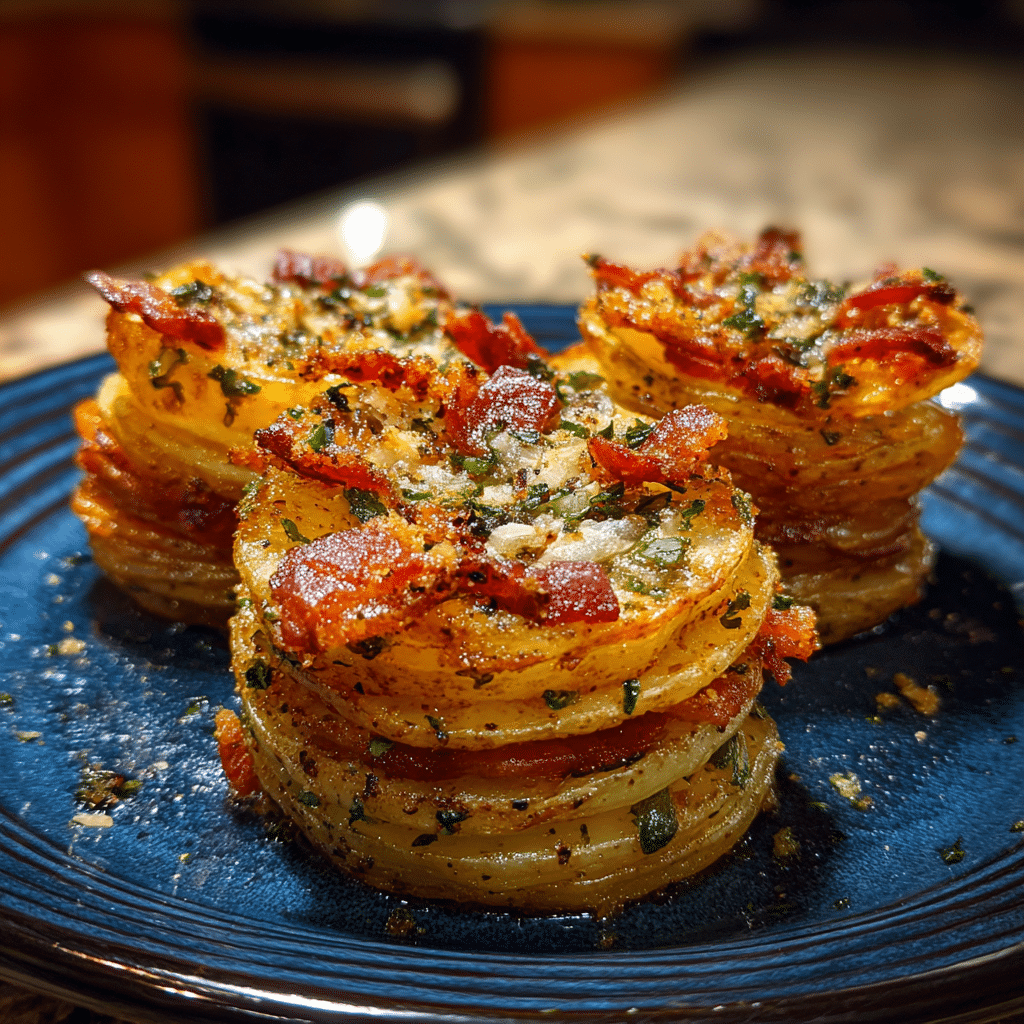
Optional toppings: sour cream, chives, or bacon bits
These add-ons make your potato stacks even more decadent when served.
Directions
Preheat your oven to 400°F (200°C). Lightly grease a 12-cup muffin tin or baking dish with butter or cooking spray. Wash and peel the potatoes, then use a mandoline slicer or a sharp knife to cut them into thin, even slices—about 1/8 inch thick.
In a large bowl, mix melted butter, olive oil, minced garlic, chopped thyme, salt, and pepper. Toss the potato slices in the mixture until every piece is coated. Stack the slices neatly in the muffin tin cavities, filling each about three-quarters full. Sprinkle a pinch of Parmesan over each stack.
Bake for 45–50 minutes until the potatoes are tender inside and crispy on the edges. Halfway through baking, you can rotate the pan for even browning. Once done, let them cool for 5 minutes before gently removing with a spoon or knife. Serve warm, optionally topped with sour cream, chives, or crumbled bacon.
Equipment needed
- Mandoline slicer or sharp knife
- Muffin tin or baking dish
- Mixing bowls
- Pastry brush or spoon
- Oven
- Measuring spoons and cups
Servings and timing
This recipe serves 6 people and takes around 15 minutes of prep time and 50 minutes of baking. It’s perfect for family dinners or festive gatherings.
Storage/reheating
Store any leftover potato stacks in an airtight container in the refrigerator for up to 3 days. To reheat, bake them at 375°F (190°C) for 10–12 minutes to restore their crispiness, or microwave briefly if you’re in a hurry.
Variations and Customizations
Cheesy delight
Add shredded cheddar, mozzarella, or Gruyère between layers for a gooey, cheesy version.
Garlic butter lovers
Double the garlic and add a touch of garlic powder to the butter mix for a bolder flavor.
Herb-infused version
Use fresh rosemary, parsley, or dill for aromatic stacks with a garden-fresh twist.
Spicy option
Sprinkle a bit of paprika, cayenne, or chili flakes between the layers for a touch of heat.
Loaded potato style
Top with sour cream, chives, and crispy bacon bits for a loaded baked potato twist.
Truffle upgrade
Add a few drops of truffle oil before baking for a restaurant-quality experience.
Vegan-friendly alternative
Replace butter with olive oil or vegan butter—I tried this with avocado oil, and the result was beautifully crispy.
Sweet potato swap
Use thinly sliced sweet potatoes instead for a colorful, naturally sweet version.
Smoky flavor
Add a dash of smoked paprika or chipotle powder to give the stacks a smoky undertone.
Mini appetizer version
Use smaller slices and bake in mini muffin tins for bite-sized party snacks.
FAQs
Can I make these ahead of time?
Yes, you can assemble the stacks ahead, refrigerate, and bake when ready to serve.
What are the best potatoes to use?
Yukon Golds are great for buttery texture, while Russets crisp up more.
How do I slice the potatoes evenly?
A mandoline slicer is the easiest way to get uniform, thin slices.
Can I make these without cheese?
Absolutely—they’re still flavorful with butter, garlic, and herbs alone.
Why use a muffin tin?
It helps the stacks hold their shape and allows for even crisping on all sides.
How do I keep the stacks from sticking?
Grease the muffin tin well with butter or non-stick spray before stacking.
Can I use dried herbs instead of fresh?
Yes, just reduce the amount by half since dried herbs are more concentrated.
Are these gluten-free?
Yes, as long as you avoid any cross-contaminated ingredients.
Can I freeze baked potato stacks?
Yes, freeze them after baking and reheat in the oven at 375°F for 15–20 minutes.
What sauces pair well with them?
Garlic aioli, ranch dressing, or sour cream with herbs make great dipping sauces.
Conclusion
Crispy Baked Potato Stacks bring sophistication to your table with minimal effort. Each golden layer delivers buttery softness inside and crisp perfection outside. Whether you serve them as a holiday side dish or a weeknight indulgence, these stacks guarantee compliments from everyone at the table. Simple, customizable, and always satisfying—this is one recipe you’ll keep coming back to.