
Why You’ll Love This Recipe
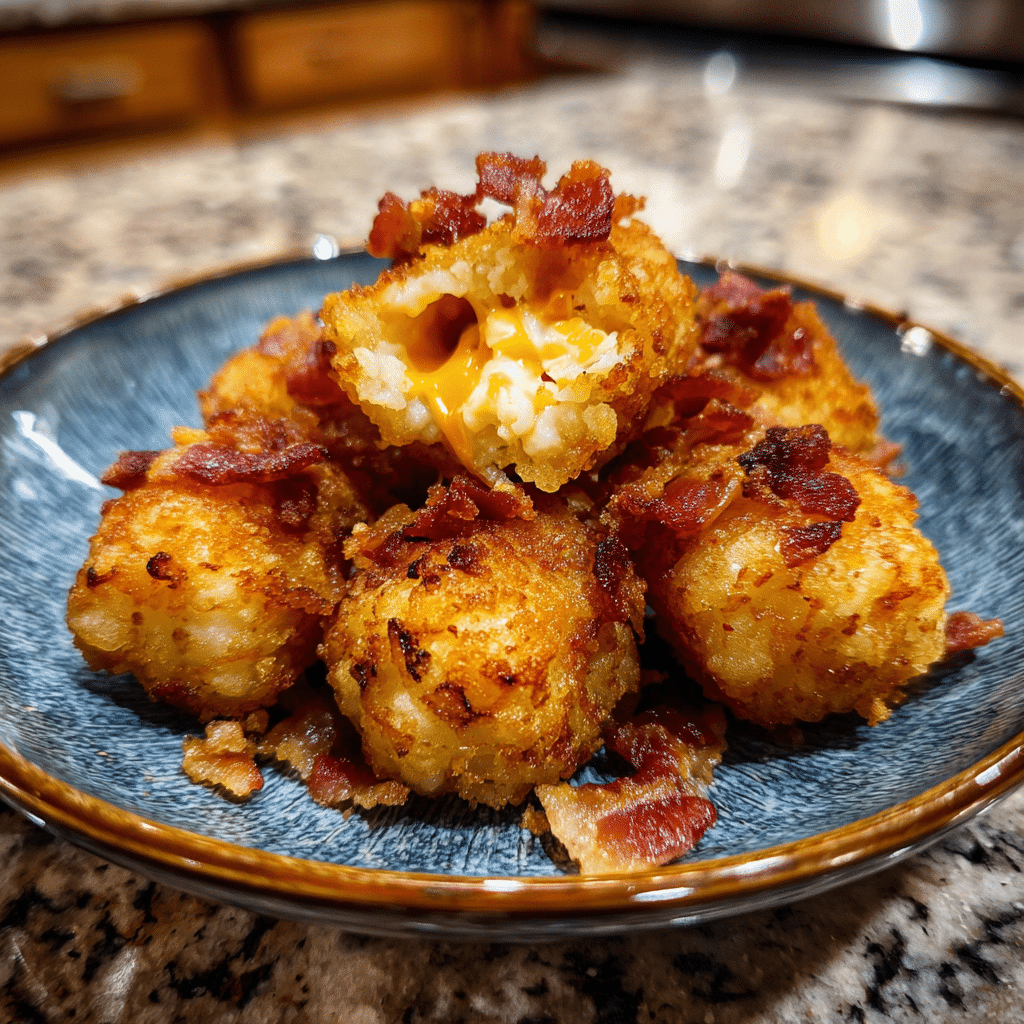
Bacon and Cheese-Stuffed Tater Tots are the ultimate comfort-food upgrade, turning a familiar freezer staple into an indulgent, crowd-pleasing snack. Crispy on the outside and filled with melted cheese and savory bacon on the inside, these tater tots deliver bold flavor and satisfying texture in every bite. I have tested this recipe for parties, game nights, and casual family dinners, and it always disappears fast. What makes these stuffed tots especially appealing is their versatility—you can serve them as an appetizer, a side dish, or even a fun snack with dipping sauces. Despite how impressive they look, they are surprisingly easy to make and require minimal ingredients. If you enjoy classic flavors done well, this recipe is guaranteed to become a repeat favorite.
Print
Bacon and Cheese-Stuffed Tater Tots (Crispy, Cheesy, and Irresistible)
- Total Time: 35 minutes
- Yield: 24 stuffed tater tots
- Diet: Gluten Free
Description
Bacon and Cheese-Stuffed Tater Tots are crispy golden potato bites filled with melted cheese and savory bacon, making an irresistible appetizer or party snack.
Ingredients
- 24 frozen tater tots
- 1/2 cup shredded cheddar cheese
- 1/4 cup cooked bacon, finely chopped
- 2 tablespoons cream cheese, softened
- 1/4 teaspoon black pepper
- Optional garnish: chopped green onions or chives
Instructions
- Preheat the oven to 425°F (220°C) and line a baking sheet with parchment paper.
- Bake the tater tots according to package instructions until lightly golden, about 15 minutes.
- Remove from oven and carefully press the center of each tater tot with the back of a spoon to create a small well.
- In a bowl, mix shredded cheddar cheese, chopped bacon, cream cheese, and black pepper.
- Spoon the cheese and bacon mixture into each tater tot well.
- Return to the oven and bake for an additional 8–10 minutes until the cheese is melted and bubbly.
- Garnish with green onions or chives if desired and serve hot.
Notes
- Use thick-cut bacon for best flavor.
- Serve immediately for maximum crispiness.
- Air fryer can be used instead of oven for extra crunch.
- Prep Time: 10 minutes
- Cook Time: 25 minutes
- Category: Appetizer
- Method: Baking
- Cuisine: American
Ingredients
(Tip: You can find the complete list of ingredients and their measurements in the recipe card below.)
Frozen Tater Tots
Frozen tater tots form the base of this recipe. Choose standard-sized tots for easier stuffing and even cooking.
Cheddar Cheese
Cheddar cheese adds sharp, savory flavor and melts beautifully inside the tots. Mild or sharp varieties both work well.
Mozzarella Cheese
Mozzarella provides stretch and creaminess, balancing the stronger flavor of cheddar.
Cooked Bacon
Crispy cooked bacon adds smoky, salty flavor. Chop it finely so it distributes evenly inside the tots.
Cream Cheese
Cream cheese helps bind the filling and creates a rich, creamy center.
Garlic Powder
Garlic powder adds subtle depth without overpowering the filling.
Black Pepper
Black pepper adds gentle heat and balances the richness.
Salt
Salt enhances the flavors but should be used lightly, as bacon and cheese are already salty.
Chopped Chives (Optional)
Chives add freshness and a mild onion note that brightens the filling.

Directions
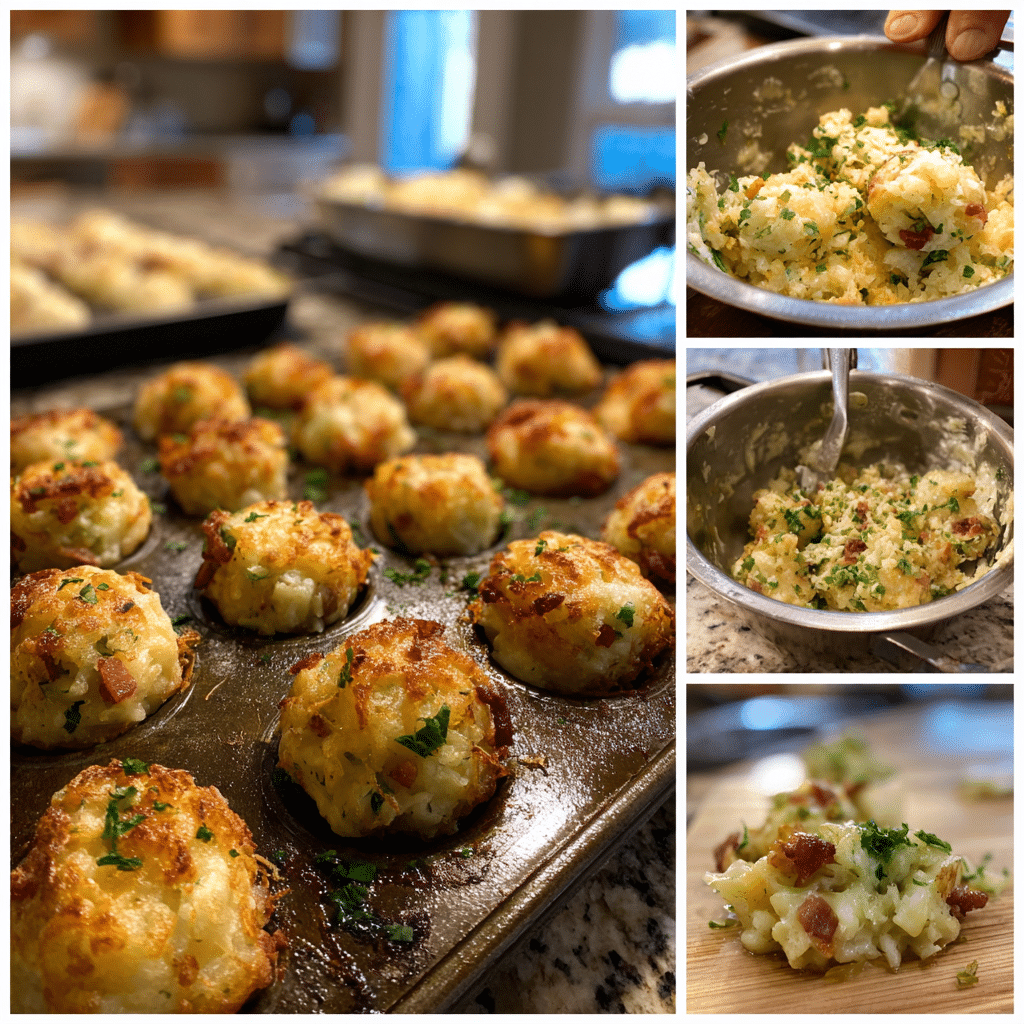
Preheat your oven to 220°C (425°F) and line a baking sheet with parchment paper.
Bake the frozen tater tots according to package instructions until just tender but not fully crisp. Allow them to cool slightly until safe to handle.
While the tots cool, prepare the filling. In a bowl, mix cream cheese, cheddar cheese, mozzarella cheese, chopped bacon, garlic powder, black pepper, and chives if using, until well combined.
Using a small knife, carefully cut a slit into each tater tot, creating a pocket without cutting all the way through. Spoon or pipe a small amount of the cheese and bacon mixture into each tot.
Return the stuffed tots to the baking sheet and bake for an additional 10 to 12 minutes, or until the outsides are golden and crispy and the filling is melted and bubbly.
Allow to cool slightly before serving.
Equipment needed :
Must-Have Tools to Get Rolling
Here’s what you’ll want to have on hand:
Silicone Spatula – Durable, heat-resistant silicone spatula perfect for mixing, scraping, and spreading. Gentle on non-stick cookware and easy to clean.
Large pot – You’ll need this to boil the whole cabbage head and soften the leaves.
large bowl –Spacious, durable large bowl ideal for mixing, serving, or food preparation. Made from sturdy material and easy to clean.
Sharp knife – For coring the cabbage and slicing out the thick stem in each leaf. A paring knife works best.
Mixing bowl – A big bowl makes it easier to combine your meat and rice filling evenly.
Cutting board – For prepping cabbage leaves and rolling them like a pro.
Full-Size Blender – is a powerful kitchen appliance for making smoothies, soups, and sauces in large batches.
3-in-1 Air Fryer – This versatile 3-in-1 air fryer offers Air Fry for healthier meals with less oil, Bake for bakery-quality desserts and treats, and Reheat to bring leftovers back to life with crispy, flavorful results.
Servings and timing
This recipe serves 4 to 6 people as an appetizer.
Preparation time: 20 minutes
Cooking time: 25–30 minutes
Total time: approximately 50 minutes
Storage/reheating
Store leftover stuffed tater tots in an airtight container in the refrigerator for up to 3 days. Reheat in the oven or air fryer at 190°C (375°F) until hot and crisp. Avoid microwaving, as it softens the exterior.
Variations and Customizations
These tater tots are easy to customize. For a spicier version, add finely chopped jalapeños or a pinch of cayenne pepper to the filling. I tested this variation, and it added a pleasant heat that paired well with the cheese.
You can substitute pepper jack cheese for cheddar to add extra spice and flavor.
For a lighter option, use turkey bacon and reduced-fat cheese. The texture remains satisfying while slightly reducing richness.
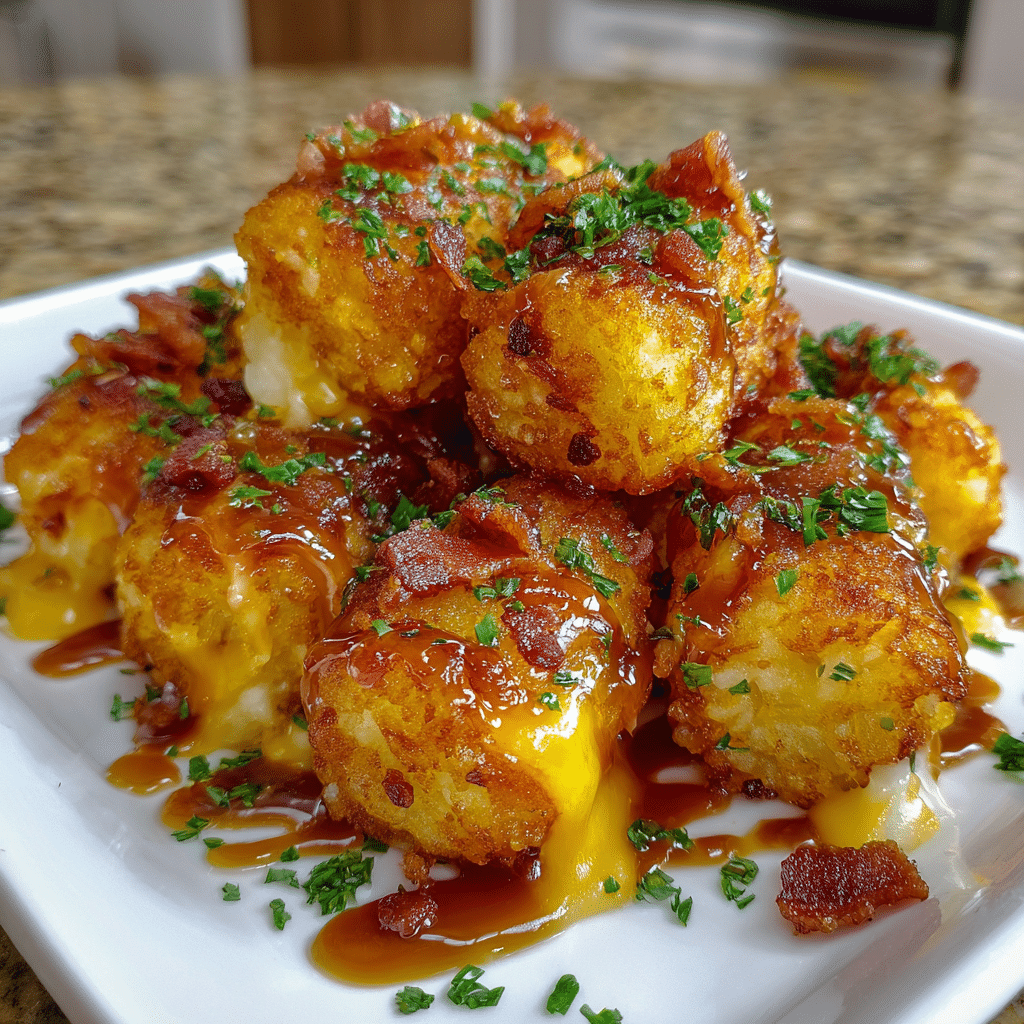
Serve with dipping sauces such as sour cream, ranch dressing, or spicy ketchup for added variety.
Nutrition and Dietary Info
Approximate nutrition per serving:
| Nutrient | Amount |
|---|---|
| Calories | 340 kcal |
| Protein | 11 g |
| Carbs | 28 g |
| Fat | 22 g |
| Saturated Fat | 9 g |
| Fiber | 3 g |
| Sugar | 1 g |
| Sodium | 620 mg |
Expert Tips & Customizations
Do Not Overbake Initially
Slightly soft tots are easier to cut and stuff.
Use Finely Chopped Bacon
This ensures even distribution in every bite.
Stuff Carefully
Overfilling can cause leakage during baking.
Bake Until Crisp
The second bake is essential for texture.
Serve Immediately
These tots are best when hot and freshly baked.
FAQs
Can I make these in an air fryer?
Yes, air fry at 200°C (400°F) until crisp and the filling is melted.
Can I prepare these ahead of time?
Yes, stuff the tots ahead and refrigerate, then bake just before serving.
Can I freeze stuffed tater tots?
Yes, freeze unbaked stuffed tots and bake from frozen, adding a few extra minutes.
What cheese works best?
Cheddar and mozzarella provide the best balance of flavor and melt.
Are these kid-friendly?
Yes, they are very popular with children.
What dipping sauces pair well?
Ranch, sour cream, cheese sauce, or barbecue sauce work well.
Conclusion
Bacon and Cheese-Stuffed Tater Tots are a bold, comforting appetizer that delivers crispy texture and rich, savory flavor in every bite. Easy to prepare and endlessly customizable, they are perfect for parties, game days, or anytime you want a satisfying snack. This recipe transforms a simple ingredient into something truly special.
Hungry for more? Visit our website for full recipes and follow us on Pinterest for daily foodie inspo you’ll love to pin!