
Introduction
Few comfort foods are as universally loved as chicken nuggets. Crispy on the outside, juicy on the inside, and perfectly bite-sized, they’re a favorite for both kids and adults. While frozen nuggets from the store are convenient, making them at home brings a completely different level of flavor and freshness. When I first tried preparing chicken nuggets in my own kitchen, I was surprised by how simple the process was and how much better they tasted compared to the packaged versions.
Why You’ll Love This Recipe
These homemade chicken nuggets are incredibly versatile and simple to prepare. The recipe uses basic ingredients that are easy to find in any kitchen, yet the result tastes restaurant-quality. Unlike many store-bought nuggets, these are made with real chicken pieces rather than processed meat.
Another reason this recipe stands out is the texture. The breading creates a perfectly crispy exterior while the chicken remains juicy and tender. The seasoning can also be adjusted depending on your preferences, making the nuggets mild or more flavorful.
Print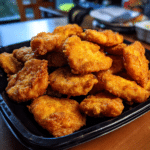
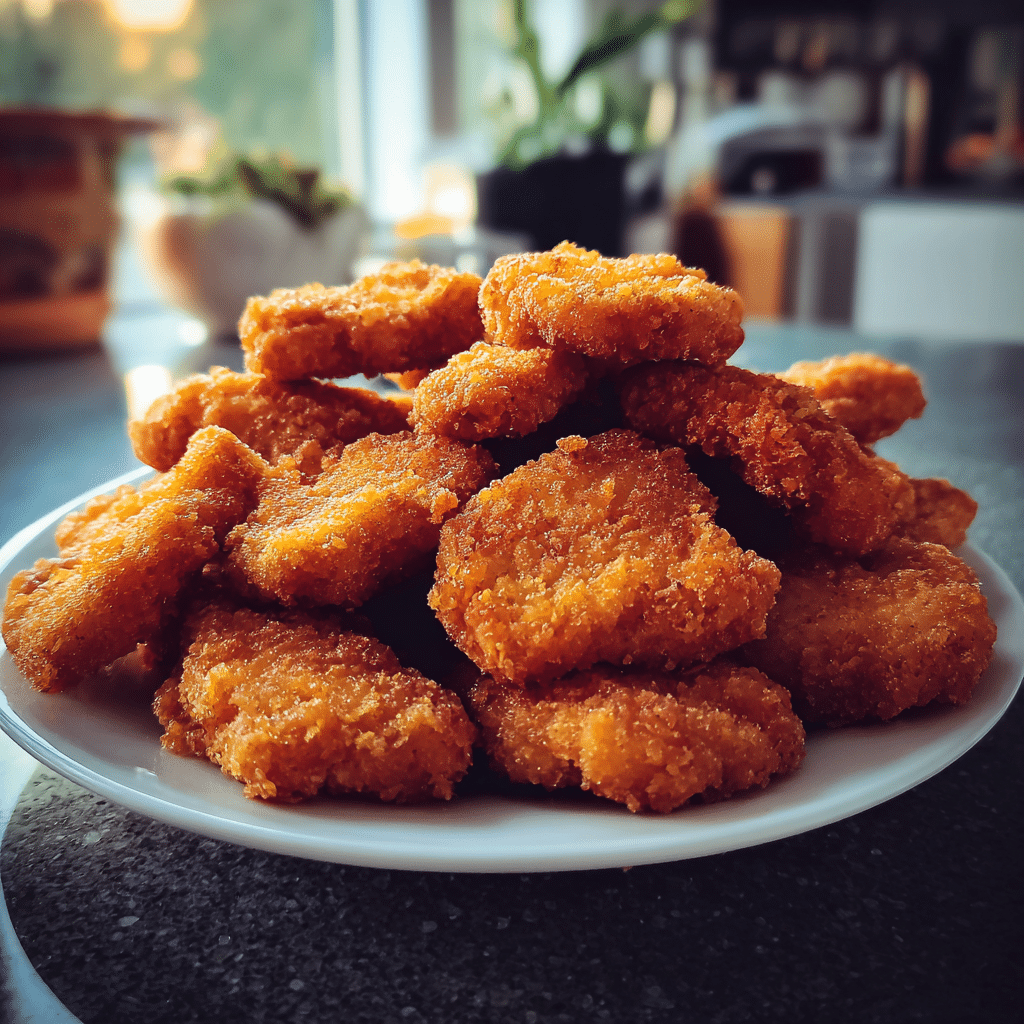
Crispy Homemade Chicken Nuggets: Better Than Takeout
- Total Time: 25 minutes
- Yield: 4 servings
- Diet: Halal
Description
Crispy homemade chicken nuggets made with tender chicken pieces coated in seasoned breadcrumbs and fried or baked until golden and crunchy.
Ingredients
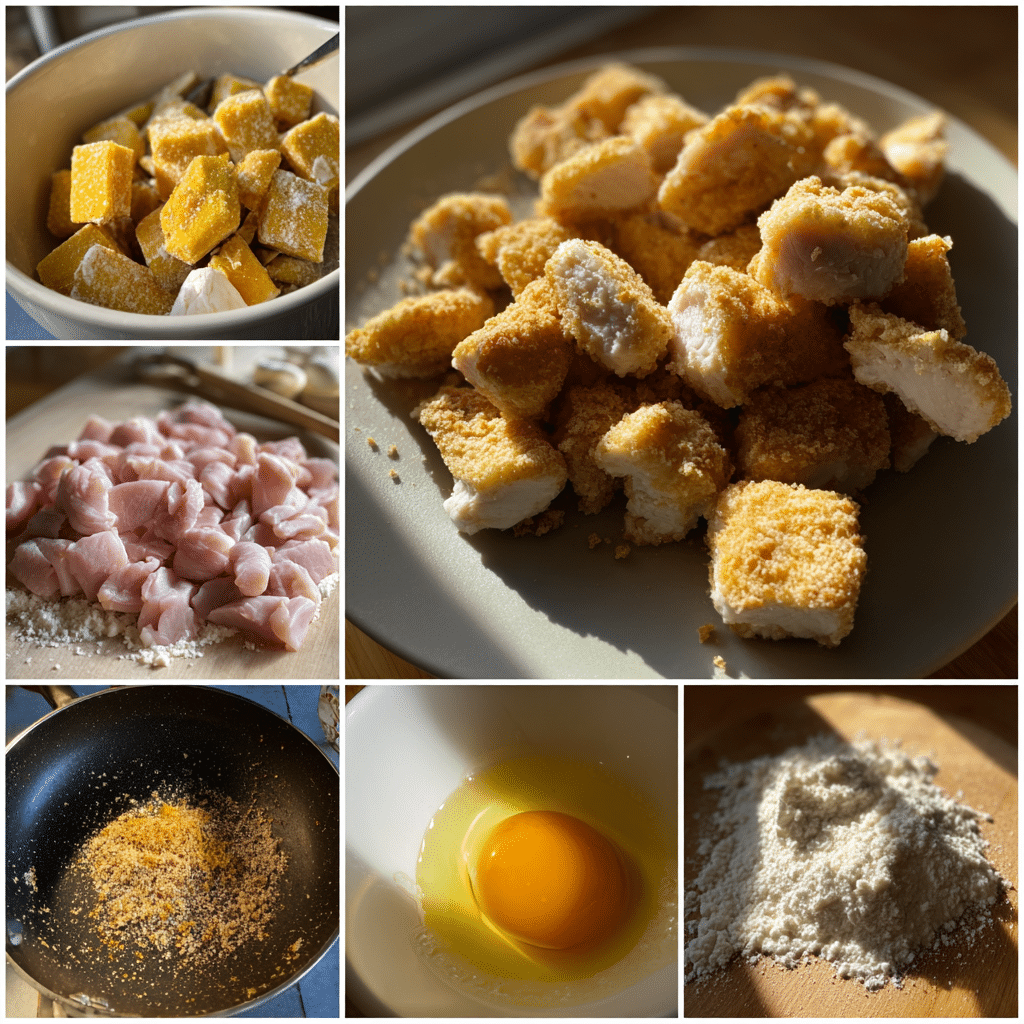
- 2 boneless skinless chicken breasts (about 500 g), cut into bite-sized pieces
- 1 cup all-purpose flour
- 2 large eggs
- 1 cup breadcrumbs (panko preferred)
- 1 teaspoon salt
- 1/2 teaspoon black pepper
- 1 teaspoon garlic powder
- 1 teaspoon paprika
- 1/2 teaspoon onion powder
- 1/2 cup milk
- Vegetable oil for frying
Instructions
- Cut the chicken breasts into small nugget-sized pieces.
- Prepare three bowls: one with flour mixed with salt, pepper, and paprika; one with eggs and milk whisked together; and one with breadcrumbs mixed with garlic powder and onion powder.
- Dip each chicken piece into the flour mixture, then into the egg mixture, and finally coat it with breadcrumbs.
- Heat vegetable oil in a deep pan to about 175°C (350°F).
- Fry the coated chicken pieces in batches for 4–5 minutes until golden brown and cooked through.
- Remove the nuggets and place them on paper towels to drain excess oil.
- Serve hot with your favorite dipping sauces.
Notes
- You can bake the nuggets at 200°C (400°F) for 18–20 minutes instead of frying.
- Panko breadcrumbs create extra crispiness.
- Ensure the internal temperature of chicken reaches 75°C (165°F).
- Serve with ketchup, honey mustard, or barbecue sauce.
- Prep Time: 15 minutes
- Cook Time: 10 minutes
- Category: Main Course
- Method: Frying
- Cuisine: American
Ingredients
(Tip: You can find the complete list of ingredients and their measurements in the recipe card below.)
Chicken breast
Fresh chicken breast is the main component of this recipe. It provides a lean source of protein and cooks quickly, making it ideal for nuggets. Cutting the chicken into evenly sized bite-sized pieces helps ensure that every nugget cooks evenly and remains tender.
All-purpose flour
Flour forms the first layer of coating and helps the egg mixture stick properly to the chicken. This step is essential because it creates the base that allows the breadcrumbs to adhere well during the breading process.
Eggs
Eggs act as the binding ingredient that holds the breading together. When the chicken pieces are dipped into beaten eggs, the coating sticks more effectively, creating that signature crispy crust once cooked.
Breadcrumbs
Breadcrumbs provide the crunchy outer texture that makes chicken nuggets so satisfying. Using panko breadcrumbs will produce an even crispier finish, but regular breadcrumbs work well too.
Garlic powder
Garlic powder adds subtle depth and flavor to the breading without overpowering the chicken. It helps enhance the savory taste of the nuggets.
Paprika
Paprika contributes mild warmth and a light smoky flavor. It also adds a golden color to the breading when cooked.
Salt
Salt is essential for bringing out the natural flavors of the chicken and the coating. Even a small amount significantly improves the final taste.
Black pepper
Black pepper adds gentle heat and balances the overall seasoning of the nuggets.
Cooking oil
Oil is used for frying the nuggets until they are golden brown and crispy. Neutral oils such as vegetable or canola oil work well because they have a high smoke point.
Directions
Start by preparing the chicken. Cut the chicken breasts into evenly sized bite-sized pieces so they cook uniformly. Pat them dry with paper towels to remove excess moisture, which helps the coating stick better.
Set up a breading station with three separate bowls. In the first bowl, place the flour and season it lightly with salt and pepper. In the second bowl, beat the eggs until smooth. In the third bowl, combine the breadcrumbs with garlic powder, paprika, and a pinch of salt.
Take each piece of chicken and first coat it in the flour mixture, making sure it is lightly covered. Then dip it into the beaten eggs so that the entire piece is coated. Finally, roll the chicken in the seasoned breadcrumbs, pressing gently to ensure the coating sticks well.
Heat oil in a deep pan over medium heat. Once the oil is hot, carefully place the breaded chicken pieces into the pan without overcrowding. Fry them for about 4 to 5 minutes, turning occasionally, until the nuggets are golden brown and fully cooked inside.
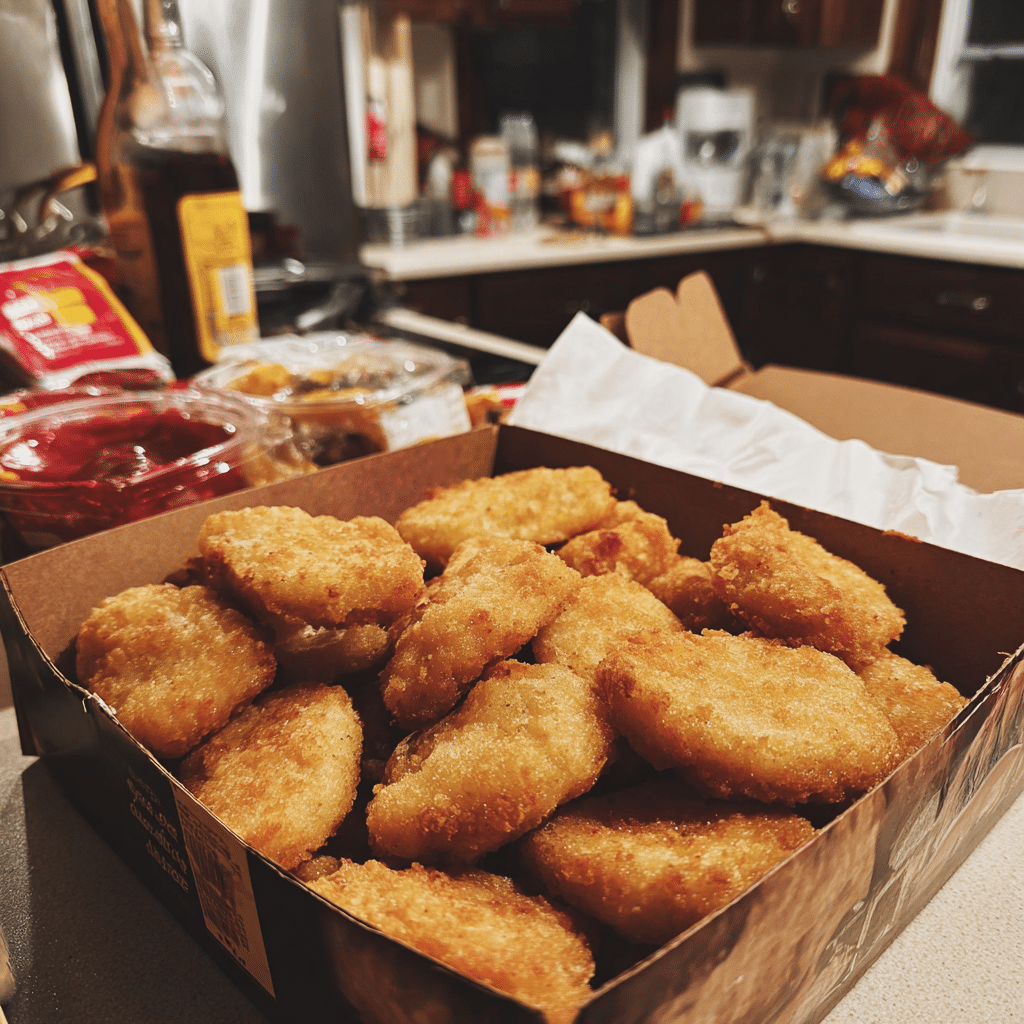
Remove the cooked nuggets and place them on a plate lined with paper towels to absorb excess oil. Serve them warm with your favorite dipping sauces such as ketchup, honey mustard, or barbecue sauce.

Equipment needed :
Must-Have Tools to Get Rolling
Here’s what you’ll want to have on hand:
Silicone Spatula – Durable, heat-resistant silicone spatula perfect for mixing, scraping, and spreading. Gentle on non-stick cookware and easy to clean.
Large pot – You’ll need this to boil the whole cabbage head and soften the leaves.
large bowl –Spacious, durable large bowl ideal for mixing, serving, or food preparation. Made from sturdy material and easy to clean.
Sharp knife – For coring the cabbage and slicing out the thick stem in each leaf. A paring knife works best.
Mixing bowl – A big bowl makes it easier to combine your meat and rice filling evenly.
Cutting board – For prepping cabbage leaves and rolling them like a pro.
Full-Size Blender – is a powerful kitchen appliance for making smoothies, soups, and sauces in large batches.
3-in-1 Air Fryer – This versatile 3-in-1 air fryer offers Air Fry for healthier meals with less oil, Bake for bakery-quality desserts and treats, and Reheat to bring leftovers back to life with crispy, flavorful results.
Servings and timing
This recipe yields approximately 4 servings. Preparation time takes about 15 minutes, while cooking time is around 10 minutes, bringing the total time to roughly 25 minutes.
Storage/reheating
If you have leftover chicken nuggets, allow them to cool completely before storing them in an airtight container in the refrigerator. They will stay fresh for up to three days.
To reheat the nuggets while keeping them crispy, place them in an oven preheated to 180°C (350°F) for about 8 to 10 minutes. An air fryer also works well for reheating and can restore the crispy texture in just a few minutes.
Avoid reheating them in the microwave if possible, as this can make the breading soft rather than crispy.
Variations and Customizations
One of the best aspects of homemade chicken nuggets is how easy they are to customize. Small adjustments in seasoning, coating, or cooking methods can create entirely new flavors while keeping the recipe simple and approachable.
For a healthier alternative, you can bake the nuggets instead of frying them. Arrange the breaded chicken pieces on a baking sheet lined with parchment paper and lightly spray them with cooking oil. Bake them at 200°C (400°F) for about 15 to 18 minutes, flipping them halfway through for even crispiness.
Air frying is another excellent option that delivers a crispy exterior with significantly less oil. Place the nuggets in a single layer in the air fryer basket and cook them at 200°C (400°F) for around 10 to 12 minutes.
You can also experiment with different coatings. Panko breadcrumbs produce a lighter, crunchier texture, while crushed cornflakes create an extra crispy coating. Some people even mix grated Parmesan cheese into the breadcrumbs for added flavor.
For a spicier version, add cayenne pepper, chili powder, or hot paprika to the breading mixture. If you prefer a more herb-forward flavor, try mixing dried oregano, parsley, or Italian seasoning into the breadcrumbs.
Another variation involves marinating the chicken pieces before breading them. A simple marinade of buttermilk, salt, and garlic powder for 30 minutes can make the chicken even more tender and flavorful.
These simple adjustments allow you to tailor the nuggets to your taste preferences while maintaining the classic crispy texture everyone enjoys.
Nutrition and Dietary Info
| Nutrient | Amount per Serving |
|---|---|
| Calories | 320 kcal |
| Protein | 28 g |
| Carbohydrates | 18 g |
| Fat | 14 g |
| Saturated Fat | 3 g |
| Fiber | 1 g |
| Sugar | 1 g |
| Sodium | 480 mg |
Expert Tips & Customizations
Use evenly sized chicken pieces
Cutting the chicken into similar sizes ensures even cooking and prevents some nuggets from drying out while others remain undercooked.
Season every layer
Adding a small amount of seasoning to the flour and breadcrumbs helps build flavor throughout the nugget rather than only on the surface.
Do not overcrowd the pan
Cooking too many nuggets at once lowers the oil temperature, which can make the coating greasy instead of crispy.
Let the breading rest briefly
Allowing the coated nuggets to rest for a few minutes before frying helps the breading adhere better during cooking.
Use a thermometer for accuracy
Chicken nuggets should reach an internal temperature of 74°C (165°F) to ensure they are fully cooked and safe to eat.
FAQs
Can I bake chicken nuggets instead of frying them?
Yes, baking is a great alternative. Place the breaded nuggets on a lined baking tray and bake at 200°C (400°F) for about 15–18 minutes, turning halfway through for even browning.
Can I freeze homemade chicken nuggets?
Yes. After breading the nuggets, place them on a tray and freeze until solid, then transfer them to a freezer bag. They can be stored for up to three months.
How do I make the nuggets extra crispy?
Using panko breadcrumbs or crushed cornflakes will give the nuggets a crunchier texture compared to standard breadcrumbs.
Can I use chicken thighs instead of chicken breast?
Yes, chicken thighs work very well and often produce juicier nuggets due to their slightly higher fat content.
What dipping sauces go well with chicken nuggets?
Popular options include ketchup, barbecue sauce, honey mustard, ranch dressing, and sweet chili sauce.
How do I know when the nuggets are fully cooked?
The nuggets should be golden brown on the outside and reach an internal temperature of 74°C (165°F) when checked with a food thermometer.
Conclusion
Homemade chicken nuggets are simple, flavorful, and far more satisfying than most store-bought options. With just a handful of ingredients and a straightforward breading process, you can create crispy nuggets that are tender and juicy on the inside.
This recipe is also flexible, allowing you to bake, fry, or air fry the nuggets depending on your preference. By adjusting the seasoning or coating, you can easily tailor the flavor to suit your taste.
Whether served as a family dinner, a quick snack, or a party appetizer, these homemade chicken nuggets are sure to become a favorite recipe you return to again and again.
Hungry for more? Visit our website for full recipes and follow us on Pinterest for daily foodie inspo you’ll love to pin!