
Introduction
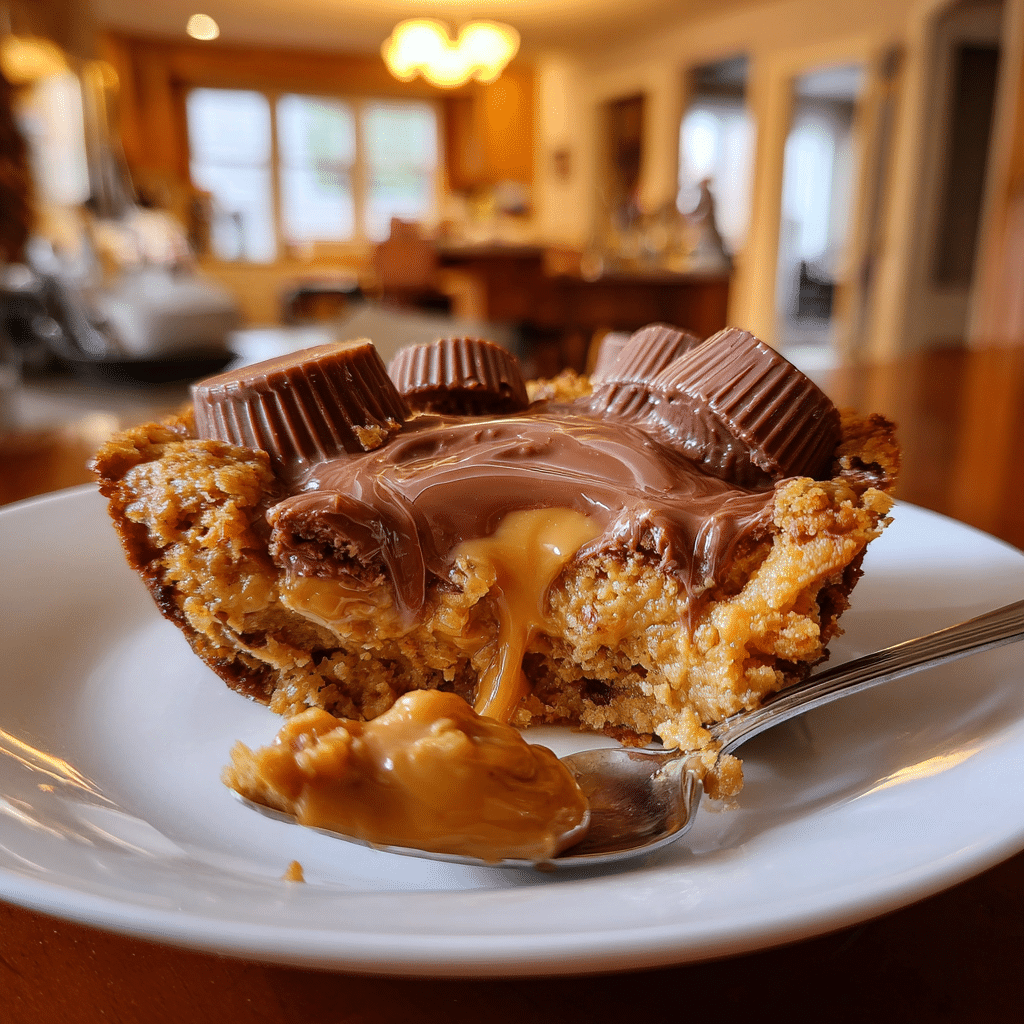
If you love the irresistible combination of chocolate and peanut butter, this Peanut Butter Cup Dump Cake is about to become one of your favorite desserts. Dump cakes are known for their simplicity, and this recipe is no exception. With minimal preparation and just a handful of pantry staples, you can create a rich, gooey dessert that tastes like it came straight from a bakery.
Why You’ll Love This Recipe
This Peanut Butter Cup Dump Cake is a perfect dessert for anyone who enjoys rich flavors without complicated preparation. It requires minimal effort, making it ideal for beginners or busy home cooks who still want a homemade treat.
One of the biggest advantages of this recipe is the time-saving method. Instead of preparing a traditional cake batter, you simply layer ingredients in the pan and bake. The result is a soft, chocolatey cake with pockets of melted peanut butter cups that create a luscious texture throughout.
Another reason to love this recipe is its versatility. You can easily adjust the ingredients depending on your preferences. Add extra peanut butter cups for a more intense flavor, drizzle peanut butter on top for added richness, or mix in chocolate chips for even more indulgence.
Peanut Butter Cup Dump Cake: The Easiest Chocolate Peanut Butter Dessert You’ll Ever Make
- Total Time: 55 minutes
- Yield: 12 servings
- Diet: Vegetarian
Description
A rich and indulgent dessert made by layering peanut butter cups, chocolate, and cake mix, then baking until gooey and delicious. This easy dump cake requires minimal prep and delivers a decadent peanut butter and chocolate flavor in every bite.
Ingredients
- 1 box (15.25 oz) chocolate cake mix
- 1 cup creamy peanut butter
- 1 1/2 cups milk
- 1 bag (10–12 oz) mini peanut butter cups, halved
- 1/2 cup semi-sweet chocolate chips
- 1/2 cup unsalted butter, melted
- 1 teaspoon vanilla extract
- 1/4 teaspoon salt
Instructions
- Preheat the oven to 350°F (175°C) and lightly grease a 9×13-inch baking dish.
- Spread the halved peanut butter cups evenly across the bottom of the baking dish.
- Sprinkle the chocolate chips over the peanut butter cups.
- In a bowl, whisk together the milk, peanut butter, vanilla extract, and salt until smooth.
- Pour the peanut butter mixture evenly over the candy layer.
- Sprinkle the dry chocolate cake mix evenly over the top without mixing.
- Drizzle the melted butter evenly over the cake mix to cover as much surface as possible.
- Bake for 40–45 minutes, or until the top is set and slightly crisp while the inside remains gooey.
- Allow the cake to cool for 10–15 minutes before serving. Serve warm, optionally with vanilla ice cream.
Notes
- For extra peanut butter flavor, drizzle melted peanut butter over the cake before serving.
- Use crunchy peanut butter if you want additional texture.
- This dessert tastes best served warm with a scoop of ice cream or whipped cream.
- Store leftovers covered in the refrigerator for up to 4 days.
- Prep Time: 10 minutes
- Cook Time: 45 minutes
- Category: Dessert
- Method: Baking
- Cuisine: American
Ingredients
(Tip: You can find the complete list of ingredients and their measurements in the recipe card below.)
Chocolate cake mix
This forms the base of the dump cake and provides the rich chocolate flavor that pairs perfectly with peanut butter. A standard boxed cake mix works well and eliminates the need for measuring multiple dry ingredients.
Peanut butter cups
These are the star ingredient of the recipe. Chopped peanut butter cups melt into the cake while baking, creating gooey pockets of chocolate and peanut butter throughout the dessert.
Sweetened condensed milk
This ingredient adds moisture and sweetness, helping create the soft, fudgy texture that makes dump cakes so irresistible.
Milk
A small amount of milk helps distribute moisture throughout the cake and keeps the crumb tender. I tried this with almond milk once, and it worked great without changing the flavor much.
Unsalted butter
Slices of butter placed over the cake mix melt during baking and help form the soft cake texture on top while adding richness.
Peanut butter
A few spoonfuls of creamy peanut butter add another layer of flavor and enhance the classic peanut butter cup taste.
Chocolate chips
Chocolate chips melt into the cake and add extra bursts of chocolate throughout the dessert.
Directions
Preheat your oven to 350°F (175°C) and lightly grease a 9×13-inch baking dish to prevent sticking. This size works perfectly for dump cakes and allows the ingredients to bake evenly.
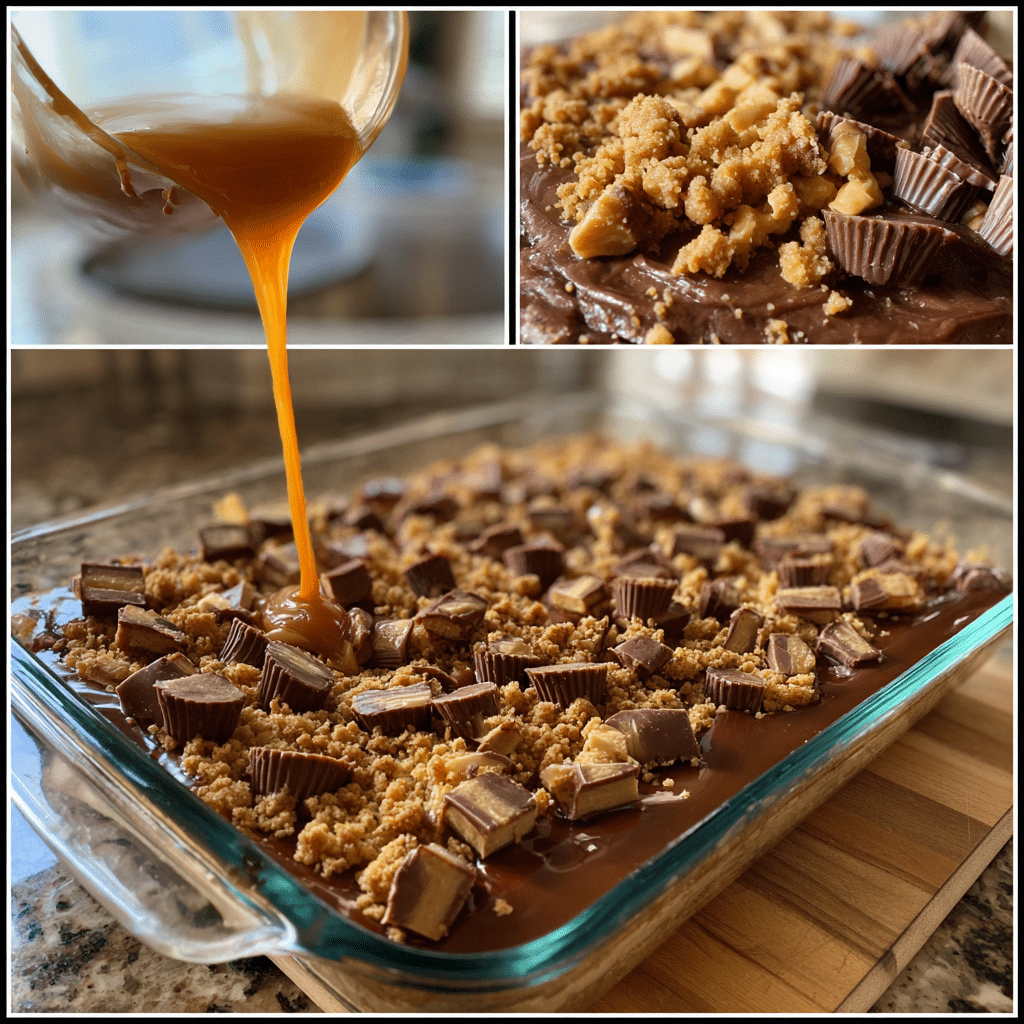
Start by spreading the chopped peanut butter cups across the bottom of the baking dish. Try to distribute them evenly so each portion of the cake gets some of that melted peanut butter and chocolate goodness.
Next, pour the sweetened condensed milk evenly over the peanut butter cups. This layer adds sweetness and moisture, which helps create the soft and fudgy texture once baked.
Sprinkle the dry chocolate cake mix evenly across the top of the dish. Do not stir the layers together—this is one of the key principles of a dump cake. The layers will combine naturally during baking.
Drizzle the milk and peanut butter over the cake mix, spreading them gently with a spoon if needed. These ingredients help hydrate the cake mix and add extra richness.
Scatter the chocolate chips across the top, then place thin slices of butter evenly over the entire surface. As the cake bakes, the butter melts and helps form the cake layer.
Bake for about 40–45 minutes, or until the top is set and slightly crisp while the inside remains soft and gooey. Allow the cake to cool for about 10 minutes before serving so the layers settle slightly.
Serve warm, ideally with a scoop of vanilla ice cream or a drizzle of chocolate sauce.
Equipment needed :
Must-Have Tools to Get Rolling
Here’s what you’ll want to have on hand:
Silicone Spatula – Durable, heat-resistant silicone spatula perfect for mixing, scraping, and spreading. Gentle on non-stick cookware and easy to clean.
Large pot – You’ll need this to boil the whole cabbage head and soften the leaves.
large bowl –Spacious, durable large bowl ideal for mixing, serving, or food preparation. Made from sturdy material and easy to clean.
Sharp knife – For coring the cabbage and slicing out the thick stem in each leaf. A paring knife works best.
Mixing bowl – A big bowl makes it easier to combine your meat and rice filling evenly.
Cutting board – For prepping cabbage leaves and rolling them like a pro.
Full-Size Blender – is a powerful kitchen appliance for making smoothies, soups, and sauces in large batches.
3-in-1 Air Fryer – This versatile 3-in-1 air fryer offers Air Fry for healthier meals with less oil, Bake for bakery-quality desserts and treats, and Reheat to bring leftovers back to life with crispy, flavorful results.
Servings and timing
This recipe yields approximately 12 servings. Preparation time is 15 minutes, baking time is 30–35 minutes, and chilling time is at least 1 hour, bringing the total time to about 2 hours.
Servings and timing
This recipe typically yields about 10 servings depending on portion size.
Preparation time: 10 minutes
Cooking time: 40–45 minutes
Total time: approximately 55 minutes
Storage/reheating
If you have leftovers, allow the cake to cool completely before storing. Place it in an airtight container or cover the baking dish tightly with plastic wrap.
The cake can be stored in the refrigerator for up to four days. The flavors often become even richer after resting overnight.
To reheat, place an individual portion in the microwave for about 20–30 seconds. If reheating a larger portion, warm it in the oven at 300°F for about 10–15 minutes until heated through.
For the best experience, serve the reheated cake warm with a scoop of ice cream or whipped cream.
Variations and Customizations
This Peanut Butter Cup Dump Cake is incredibly adaptable, making it easy to customize based on what you have available or the flavors you prefer.
One simple variation is switching the cake mix flavor. While chocolate cake mix provides the most classic pairing with peanut butter cups, devil’s food cake mix can make the dessert even richer. A yellow cake mix can also work if you want a lighter chocolate flavor.
You can also experiment with different peanut butter products. Chunky peanut butter will add texture, while a swirl of melted peanut butter across the top can create a beautiful marbled effect once baked.
For extra crunch, consider adding chopped peanuts or crushed peanut butter cookies between the layers. This adds contrast to the soft cake and gooey chocolate.
Another fun idea is incorporating caramel. A drizzle of caramel sauce over the condensed milk layer introduces a salty-sweet element that pairs beautifully with the chocolate and peanut butter flavors.
If you prefer a slightly less sweet dessert, you can reduce the amount of sweetened condensed milk and add a few tablespoons of cream instead.
You can also turn this into a “loaded” dump cake by adding mini marshmallows during the last 10 minutes of baking. The marshmallows melt and lightly toast, adding another delicious layer of flavor.

Nutrition and Dietary Info
Below is the approximate nutrition information per serving.
| Nutrient | Amount per Serving |
|---|---|
| Calories | 520 kcal |
| Protein | 8 g |
| Carbohydrates | 60 g |
| Fat | 28 g |
| Saturated Fat | 14 g |
| Fiber | 3 g |
| Sugar | 40 g |
| Sodium | 380 mg |
Values may vary slightly depending on the brand of ingredients used.
Expert Tips & Customizations
Use room temperature ingredients
Allowing ingredients like butter and peanut butter to soften slightly helps them spread more evenly across the cake.
Do not mix the layers
Dump cakes rely on layering rather than mixing. Stirring the ingredients together will change the final texture.
Chop peanut butter cups evenly
Uniform pieces ensure the chocolate and peanut butter distribute throughout the cake instead of forming large clumps.
Add toppings after baking
For extra indulgence, sprinkle crushed peanut butter cups or chocolate chips on top immediately after removing the cake from the oven.
Let the cake rest before serving
Allowing the cake to sit for 10 minutes helps the melted layers settle and improves the final texture.
FAQs
Can I use mini peanut butter cups instead of regular ones?
Yes, mini peanut butter cups work very well and distribute more evenly throughout the cake.
Can I make this dump cake ahead of time?
Yes, you can bake the cake earlier in the day and reheat it before serving for the best texture.
Can I freeze Peanut Butter Cup Dump Cake?
Yes, the cake can be frozen for up to two months. Wrap portions tightly in plastic wrap and place them in an airtight container.
Do I need to mix the cake mix before adding it?
No, the cake mix should remain dry when sprinkled over the layers. The moisture from the other ingredients will hydrate it during baking.
What is the best way to serve this dessert?
It is best served warm with vanilla ice cream, whipped cream, or a drizzle of chocolate sauce.
Can I use homemade cake mix instead of boxed mix?
Yes, a homemade chocolate cake mix substitute can work, but it will require properly measured dry ingredients to mimic the boxed version.
Conclusion
Peanut Butter Cup Dump Cake is a dessert that proves great baking does not have to be complicated. With just a few ingredients and minimal preparation, you can create a rich and satisfying treat packed with chocolate and peanut butter flavor.
Its warm, gooey texture and indulgent taste make it perfect for family dinners, potlucks, or whenever you need a quick dessert that feels special. Once you try this recipe, it will likely become one of your go-to desserts whenever a chocolate and peanut butter craving strikes.
Hungry for more? Visit our website for full recipes and follow us on Pinterest for daily foodie inspo you’ll love to pin!